Using Thumbstacks, you can create a slide show presentation online and then share it with others by providing a link. You need to sign up for an account, but it’s free.
Here’s a quick slide show I made in Thumbstacks: http://thumbstacks.com/p/jo/Creating+JPGs
You should recognize this slide show from the instructions I provided in the last blog entry for how to create a JPG in PowerPoint.
I discovered Thumbstacks and how to create a JPG in PowerPoint at the same time as I examined some TeacherTube videos. In particular, I viewed Intro to Thumbstacks (http://www.teachertube.com/view_video.php?viewkey=6dd3cc56283f2313522d).
Creating slide shows in Thumbstacks is easy. Some of the menu choices are available at the top of the screen and some become available by right-click (on a two-button mouse) or control-click. Text-formatting options are available. You can upload images. You can drag-and-drop. Themes and styles are available.
The slide shows don’t have all the features of a full-fledged presentation tool. Options missing are transitions, sound, video, and drawing tools. A forum (bugs; feature requests and ideas; and comments, criticism and questions) is available.
Thumbstacks includes an option for real-time use during remote meetings. I haven’t tried this yet.
Thumbstacks is an easy-to-use Web 2.0 application for creating and viewing presentations. Both teachers and students would, most likely, find Thumbstacks very useful.
Sunday, July 29, 2007
Sunday, July 22, 2007
Creating JPGs
I’ve used AppleWorks for years to create files formatted as JPGs. The AppleWorks Draw module is very easy to use… to mix graphics and text… to create title pages, logos, and other JPG files.
The Save As options in Word do not, however, include JPG. So, I thought that Microsoft Office had not provided the option to save a file as a JPG.
I just learned that there is a procedure in Microsoft Office to do this. I was looking in the wrong application. I needed to look at PowerPoint.
Here’s how you create a JPG in PowerPoint…
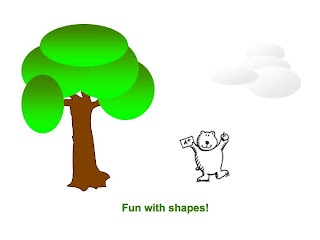
Here's a JPG image I created in PowerPoint using this procedure. BTW, I never said I was an artist! ;)
I’ll share in next week’s blog entry how I discovered this procedure.
The Save As options in Word do not, however, include JPG. So, I thought that Microsoft Office had not provided the option to save a file as a JPG.
I just learned that there is a procedure in Microsoft Office to do this. I was looking in the wrong application. I needed to look at PowerPoint.
Here’s how you create a JPG in PowerPoint…
- Launch PowerPoint
- Create a blank slide (slide layout)
- View > Toolbars > Drawing
- Create a image using choices on the Drawing toolbar
- Save As whatever.jpg
Here's a JPG image I created in PowerPoint using this procedure. BTW, I never said I was an artist! ;)

I’ll share in next week’s blog entry how I discovered this procedure.
Tuesday, July 17, 2007
TeachersFirst.com Provides High-Quality Resources for Teachers
TeachersFirst.com (http://www.teachersfirst.com/index.cfm) continues to provide useful resources. Some of these are helpful when working in the classroom with students and others help you grow as a teacher. Experienced teachers review the web sites so you know that any site listed is of good quality.
The featured classroom sites for this week include cave writings, how cells divide (mitosis vs. meiosis), and book reviews by students on podcasts. In the professional area, one of the resources I found is a list of very good ideas for working together with parents.
In addition to the many web sites TeachersFirst reviews—with suggestions for classroom use—a new feature is the TeachersFirst Edge. This section is where Web 2.0 tools are recommended. One particularly helpful feature is the page of practical tips for teachers who use these tools. You can tell the tips are written by “real” teachers.
I have listed only a few of the resources available at TeachersFirst. I’m sure you’ll find many useful ideas when you explore the site.
Monday, July 16, 2007
Ohio Treasure Chest of Technology Resources
Eric Curts, technology specialist, and the North Canton City Schools (Ohio, USA) publish a web site rich with resources to use when integrating technology in the curriculum. Their web site--the Ohio Treasure Chest of Technology Resources (http://ohiotreasurechest.org/)--is designed to work with Ohio’s technology standards; however, it can be helpful no matter which set of technology standards you’re using.
At this site you will find thousands of web sites that are aligned to the Ohio Academic Content Standards in the four core areas--mathematics, science, language arts, and social studies. There are three good features about each of these sites: (1) they have been reviewed by teachers, (2) they are interactive, and (3) they are free. If you click on the podcast link on the Ohio Treasure Chest’s home page, you find information about related podcasts and a blog.
The resources are categorized as:
• Language Arts - Reading
• Language Arts - Writing
• Mathematics
• Science
• Social Studies
• Technology
• General
The site includes a process for any user to add a resource (web site) to the treasure chest. And, in case you’re not sure if the web site you’re considering adding is good enough, there’s a link to a site—Gems vs. Junk—to help you decide.
The web sites are sorted into K-12 grade levels plus general. When you go to any category (e.g., English Language Arts – Reading – Grade 1) you find the content indicators for the grade level. You can choose web resources that support an indicator or indicators from other content areas that relate to the indicator. New areas that are being added are lesson plans, comments, and assessments. To give you an idea of the quantity of web sites in this treasure chest, in English Language Arts – Reading there are a total of 628 resources in K-12 and general and in the Mathematics category there are 1,281 resources.
The resources at this web site don’t stop there. There is a page of “Viewers, Helpers, and Plugins” should you need to download a utility such as Adobe Acrobat Reader, Java, or a PowerPoint viewer. There are tools that Eric Curts and the North Canton City Schools used to help implement the Ohio Technology Academic Content Standards in their district. And a page of ideas for how to use the Ohio Treasure Chest resources is also available.
This truly IS a treasure chest!
Sunday, July 1, 2007
Picnik... Really Good Online Photo Editing
Wow! I’ve been testing a Web 2.0 application that’s a winner. Picnik (http://www.picnik.com/) is an online photo-editing tool. It does a very good job and it’s incredibly easy.
You can access photos you want to edit from your computer, from any web site, even Flickr, Picasa Web Albums, and Facebook. You can also email your photos from Picnik.
You can:
• fix underexposed photos,
• crop,
• rotate,
• resize,
• remove red-eye,
• sharpen,
• or apply special effects to your photos.
Because Picnik is an online tool, there is nothing to download and it works on Mac, Windows, and Linux operating systems. I tested the free version, although there will soon be an additional version for a fee. While the company is in beta testing, you can use all features for free. When the beta is completed, basic photo editing will be available in a free version and a premium (fee-based) version will be available with more tools, storage, and content.
The company provides some tools to make it even easier to use Picnik.
• Bookmarklet makes it possible for you to grab an image from any web site.
• The Firefox extension enables you to grab a screenshot of any web site. This could be very useful for handouts or blog posts.
• The Yahoo Widget allows you to upload a photo directly to Picnik by drag and drop.
• It’s easy to take an image from any web site to Picnik in one click in Firefox, Safari, and Explorer.
The company maintains a blog so you know what’s going on and a forum so you can ask for help.
Minimum system requirements are:
• Microsoft Windows XP or Mac OS X
• 1GHz processor or better
• at least 256 MB of RAM
• Internet Explorer version 5.0 or higher or
• Firefox 1.0 or higher.
Subscribe to:
Posts (Atom)